springboot+swagger2.10.5+mybatis-plus 入門詳解
懂得懂的
2020.3
2020.2.4
2020.2.3
2020.2.2
20.2.1
2019.3
2018.3
最新2020永久
springboot簡介:個人對springboot的一點小的理解:
1.最大優勢:簡化配置區別于傳統的 MVC 模式,對于配置進行了大量的簡化,魔鬼注解:SpringBootApplication 中包含了的注解
@SpringBootConfiguration@EnableAutoConfiguration@ComponentScan
基本包含了傳統項目啟動所需要的注解
2.將原始的 tomcat 等 web 容器默認引入,不需要配置 web 容器2020-12-23 14:56:23.683 INFO 11124 --- [main] c.l.d.DataStandardApplication : The following profiles are active: dev2020-12-23 14:56:24.871 INFO 11124 --- [main] o.s.b.w.embedded.tomcat.TomcatWebServer : Tomcat initialized with port(s): 8080 (http)2020-12-23 14:56:24.877 INFO 11124 --- [main] o.apache.catalina.core.StandardService : Starting service [Tomcat]
可以看出 默認選取 tomcat 為 web 啟用容器。
開始簡單搭建:0.所屬環境:1.jdk環境,在cmd后天輸入: java -version 查看是否為jdk1.8版本以上(個人建議1.8,目前穩定版本有1.8 1.11和1.14 版本)
C:Usershzp>java -versionjava version '1.8.0_251'Java(TM) SE Runtime Environment (build 1.8.0_251-b08)Java HotSpot(TM) 64-Bit Server VM (build 25.251-b08, mixed mode)
如果沒有出現,可以到 oracle 官網下載 jdk,官網地址:JDK官網下載地址,但是需要 oracle 賬號,當然你可以直接從我的網盤下載:Linux系統jdk1.8網盤地址,
鏈接: https://pan.baidu.com/s/1IS0e-rSleFzW5YHo0aTMPw
提取碼: ktmd
windows 系統jdk1.8網盤地址,
鏈接: https://pan.baidu.com/s/1RGThC5gvbX3LjHA3nc8pHQ
提取碼: d23k
可以自行百度進行jdk安裝和配置,此處不做詳細介紹。
2.開發工具 idea去官網下載,建議下載低2個大版本的,因為網上pojie版本很少找到新版本pojie的方法。下載地址:idea下載地址建議下載一個版本的 idea 如圖:
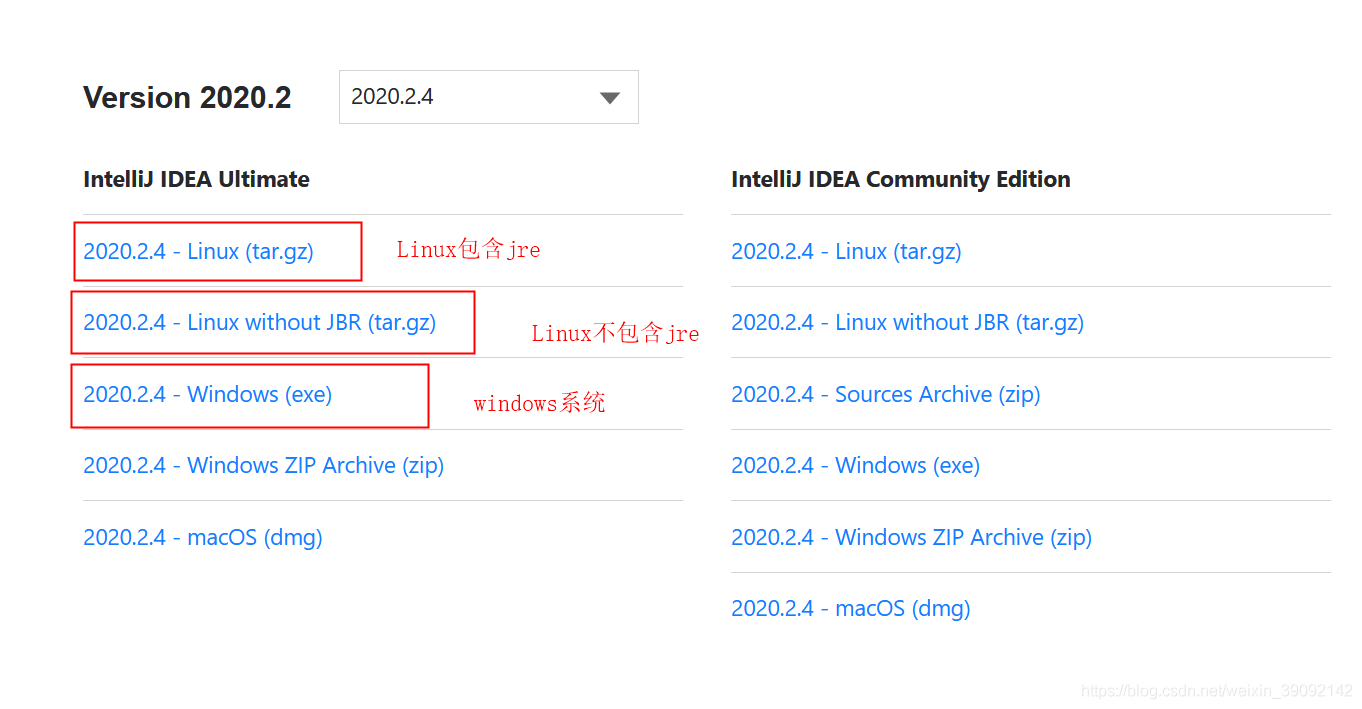
目前版本為2020.3,建議選擇版本為 2020.2及以后版本
3.maven 環境,建議安裝一下 maven 環境,便于從國內鏡像地址 aliyun 下載。
下載 maven 的地址,建議下載 3.6.1maven3下載地址安裝 maven 進行配置(此處不做詳細介紹)配置完成后在終端輸入: mvn -v
C:Usershzp>mvn -vApache Maven 3.6.3 (cecedd343002696d0abb50b32b541b8a6ba2883f)Maven home: H:apache-maven-3.6.3bin..Java version: 1.8.0_251, vendor: Oracle Corporation, runtime: H:Javajdk1.8.0_251jreDefault locale: zh_CN, platform encoding: GBKOS name: 'windows 10', version: '10.0', arch: 'amd64', family: 'windows'
對 settings.xml 進行配置(我的maven在F盤,H:apache-maven-3.6.3conf 為settings),將mirrors替換如下,詳細配置如下:
<mirrors><mirror> <id>aliyunmaven</id> <mirrorOf>*</mirrorOf> <name>阿里云公共倉庫</name> <url>https://maven.aliyun.com/repository/central</url></mirror><mirror> <id>nexus-aliyun</id> <mirrorOf>central</mirrorOf> <name>Nexus aliyun</name> <url>https://maven.aliyun.com/repository/public</url> </mirror><mirror><id>aliyunmaven</id><mirrorOf>*</mirrorOf><name>阿里云spring插件倉庫</name><url>https://maven.aliyun.com/repository/spring-plugin</url></mirror><mirror> <id>repo2</id> <name>Mirror from Maven Repo2</name> <url>https://repo.spring.io/plugins-release/</url> <mirrorOf>central</mirrorOf> </mirror> </mirrors>
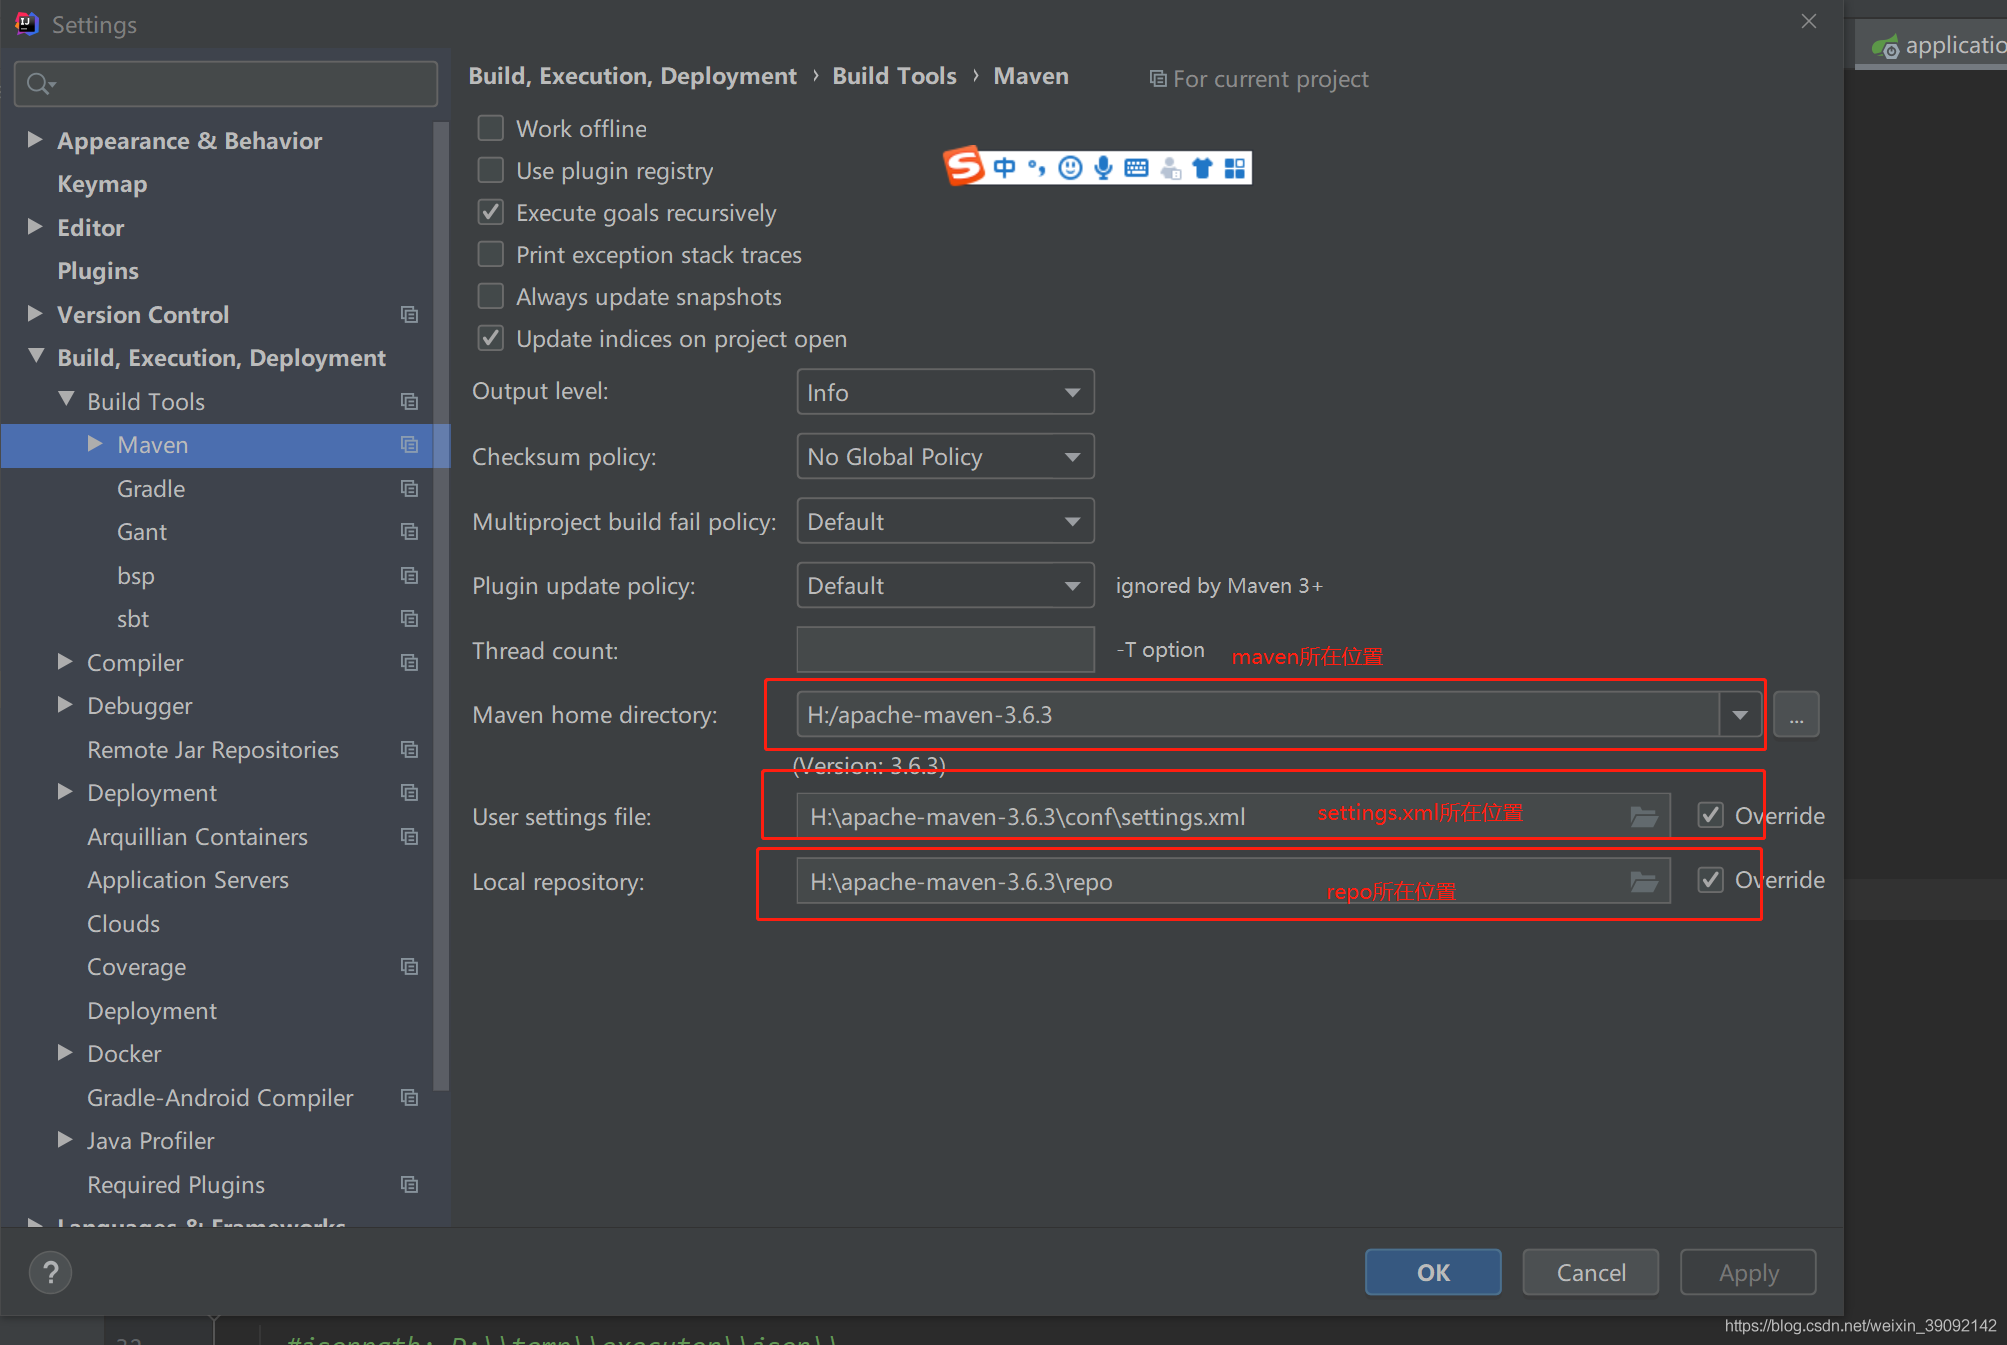
打開 idea 從 左上角 file 中找到 Settings 對 maven 進行配置,如圖:
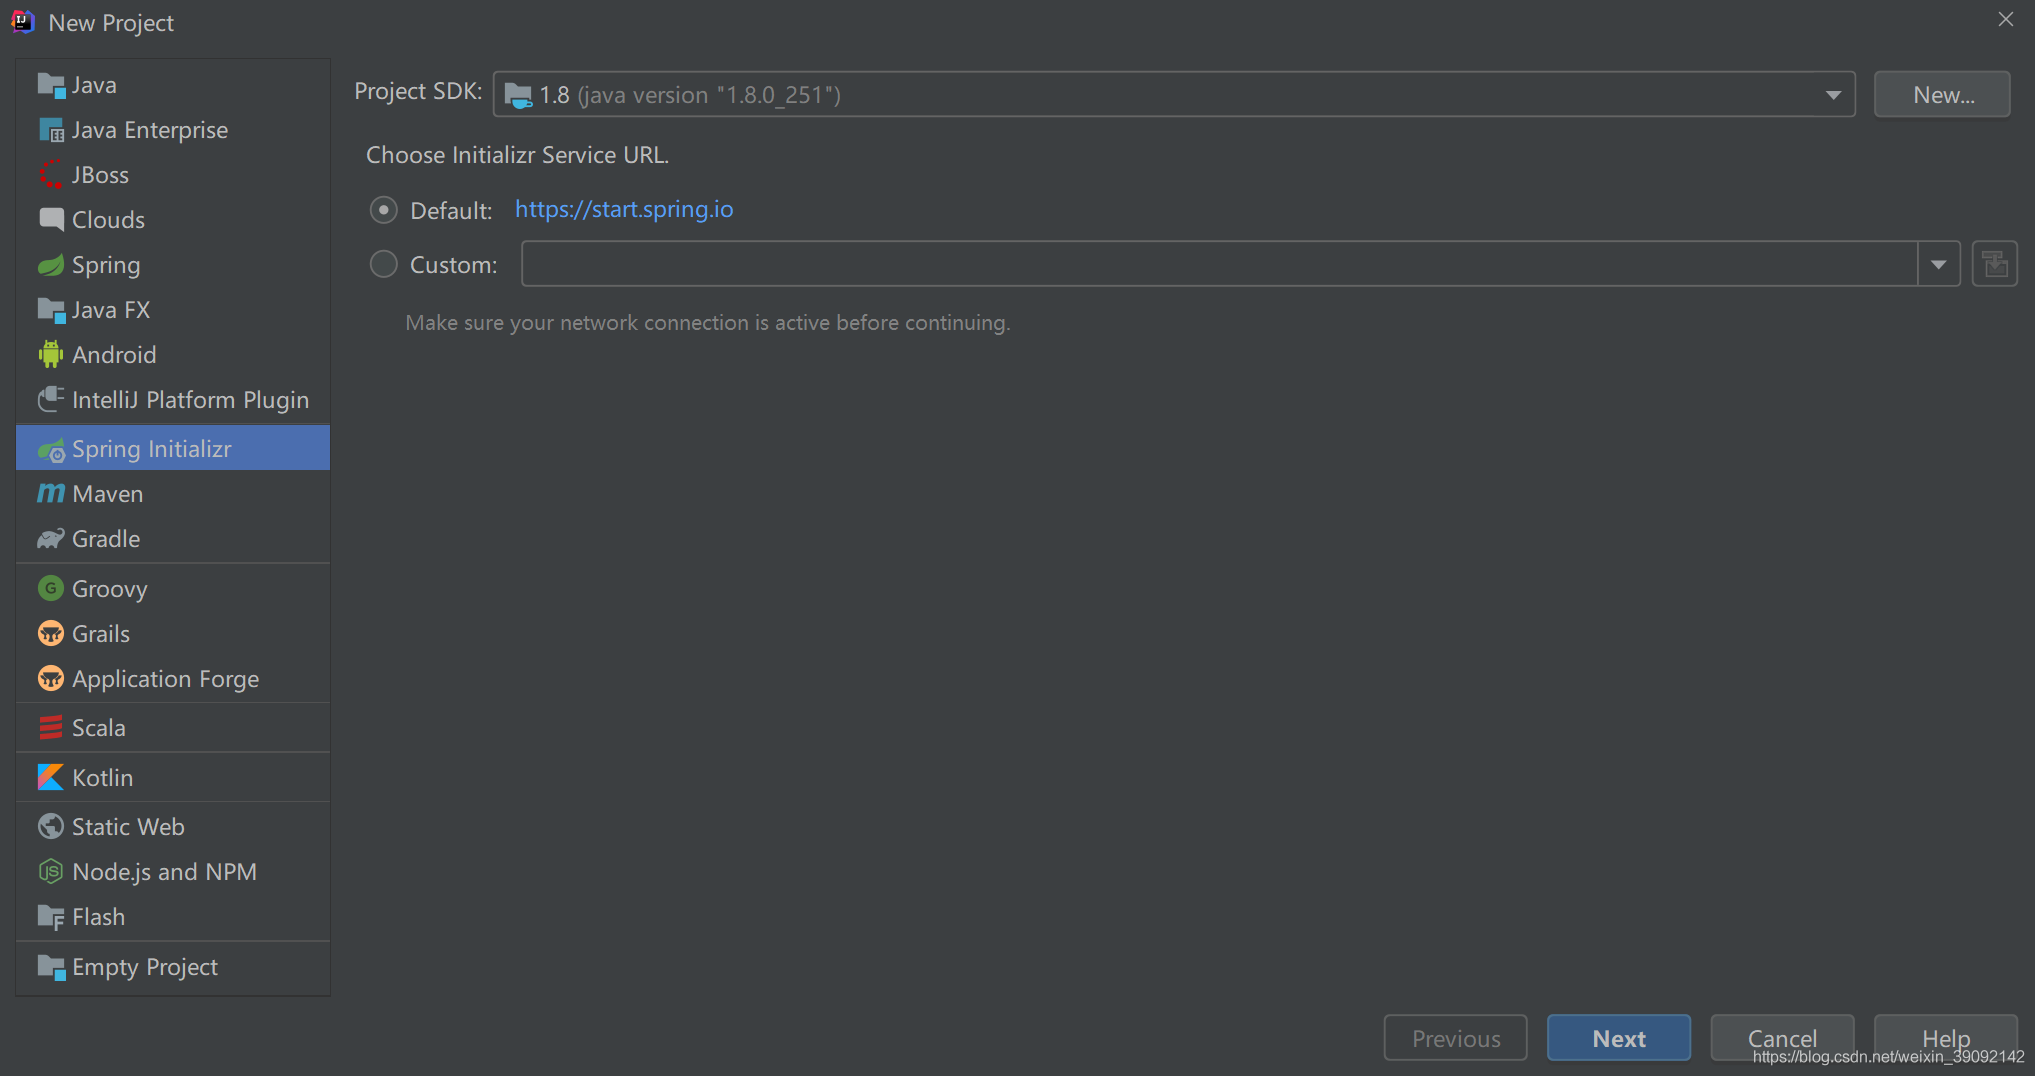
1.打開idea,找到最左邊的 file ,點擊file,然后選擇 new ,再選擇右邊的 Project ,如下圖:
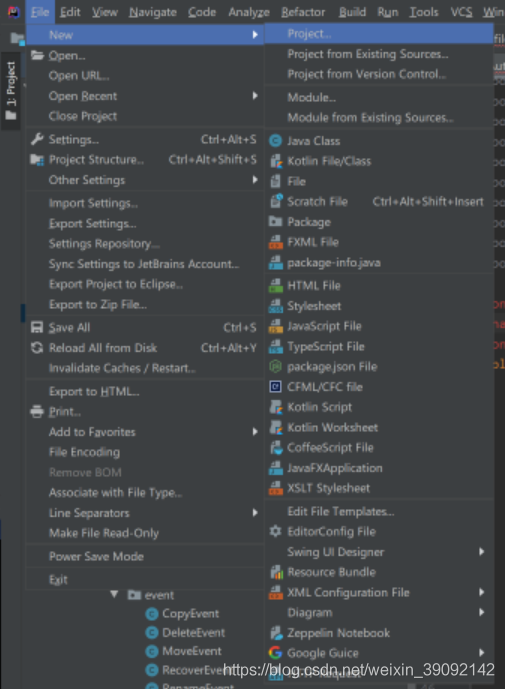
選擇后出現如下圖片:
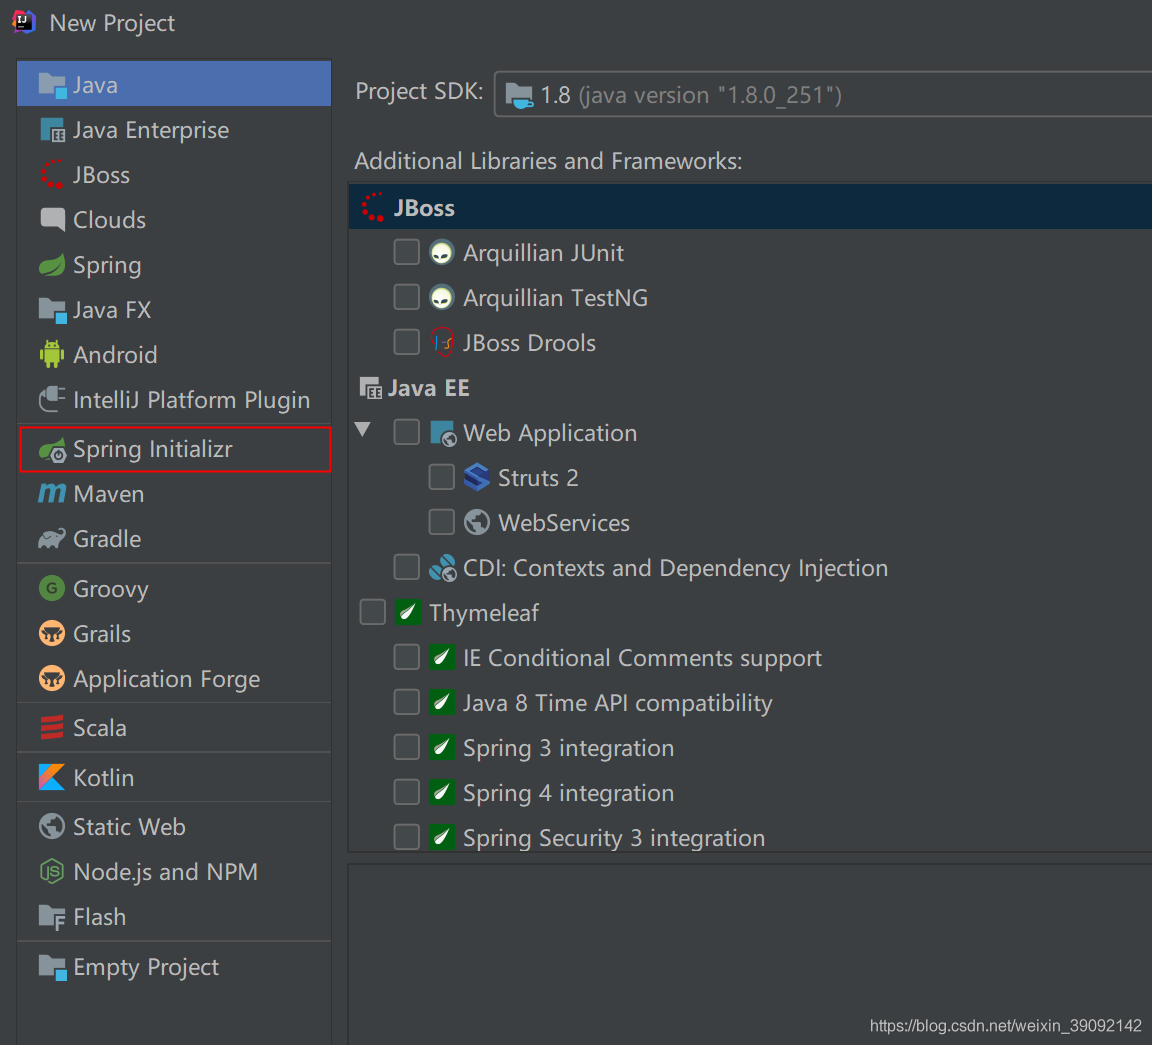
點擊選擇紅色方框:
點擊next進行下一步選擇:

選擇后點擊 Next 下一步:
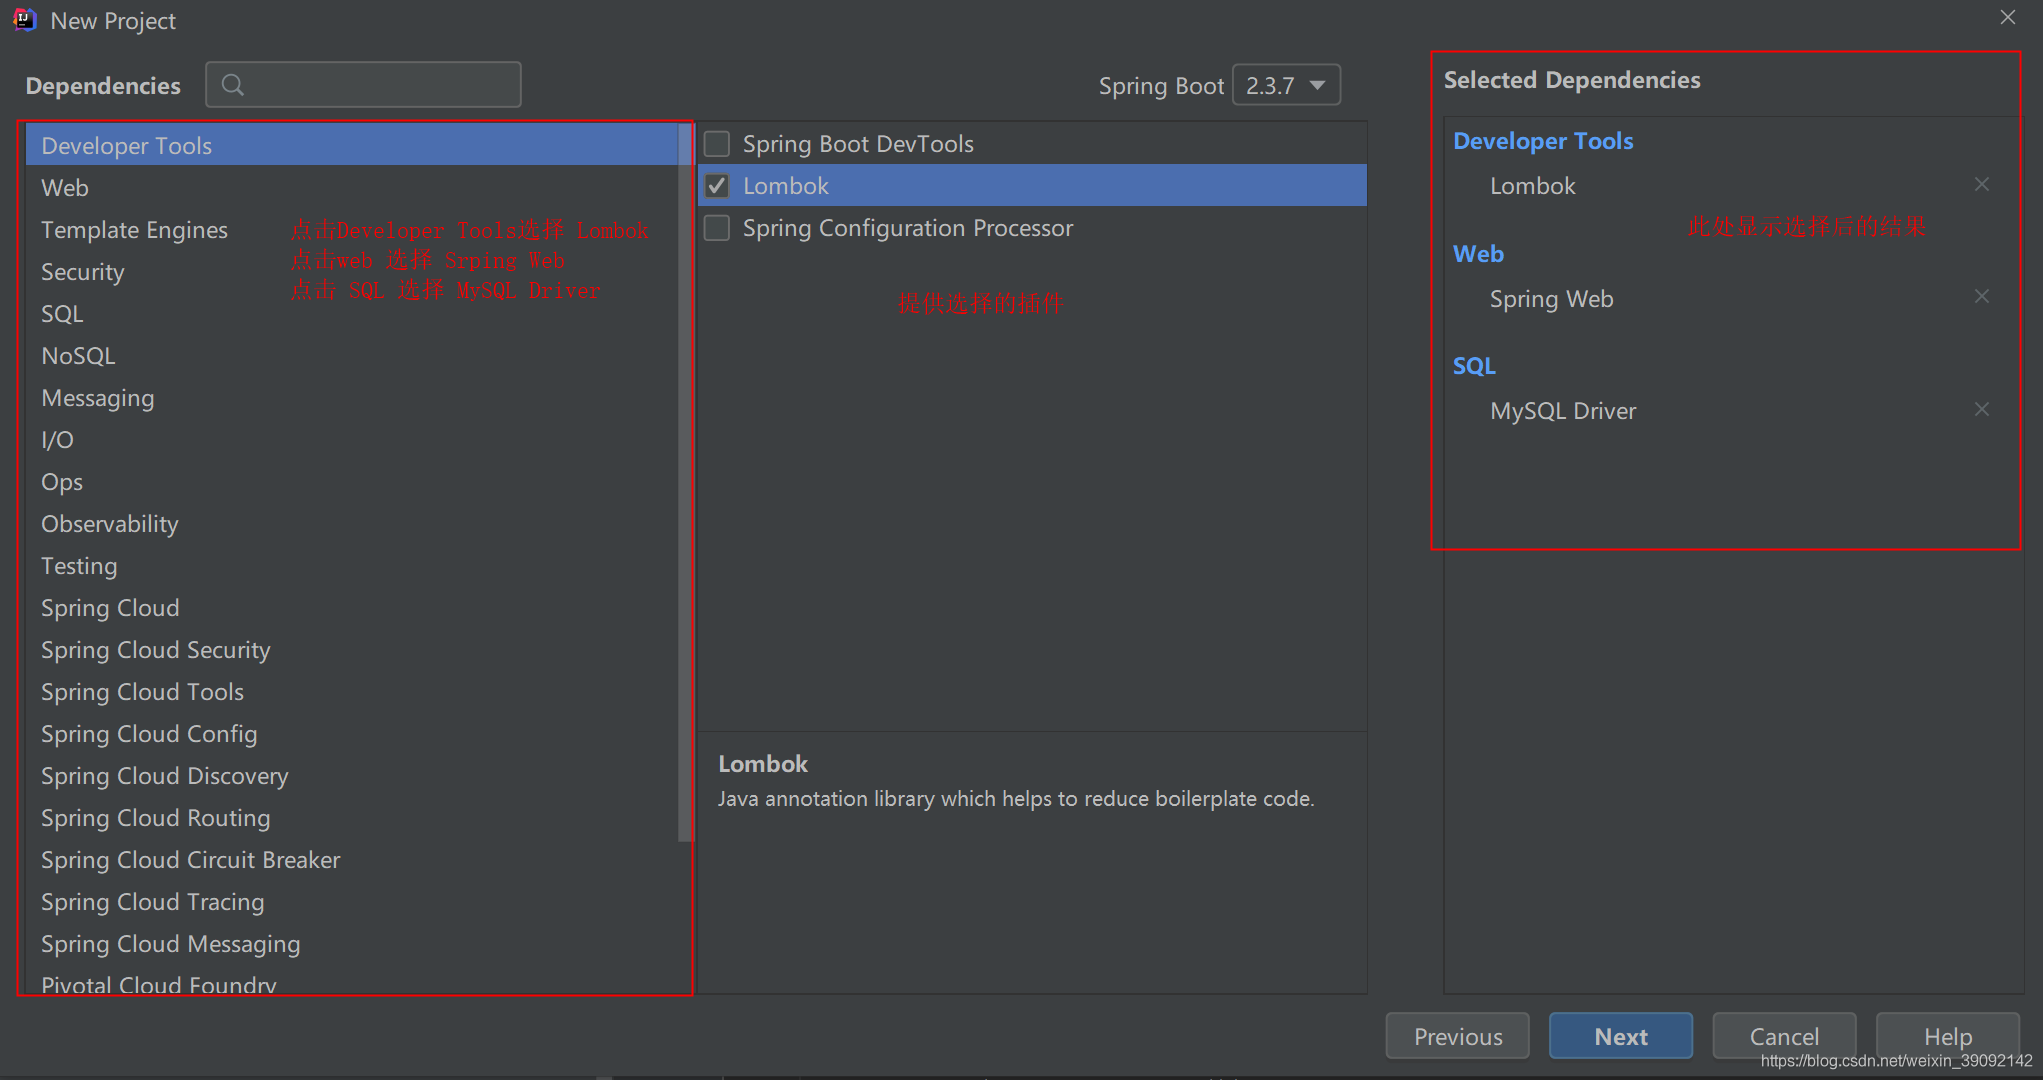
按照圖片顯示的方法進行選擇開發所需要的依賴,點擊 next .進行project名稱的選擇,也可以選擇直接點擊 finish,如圖:
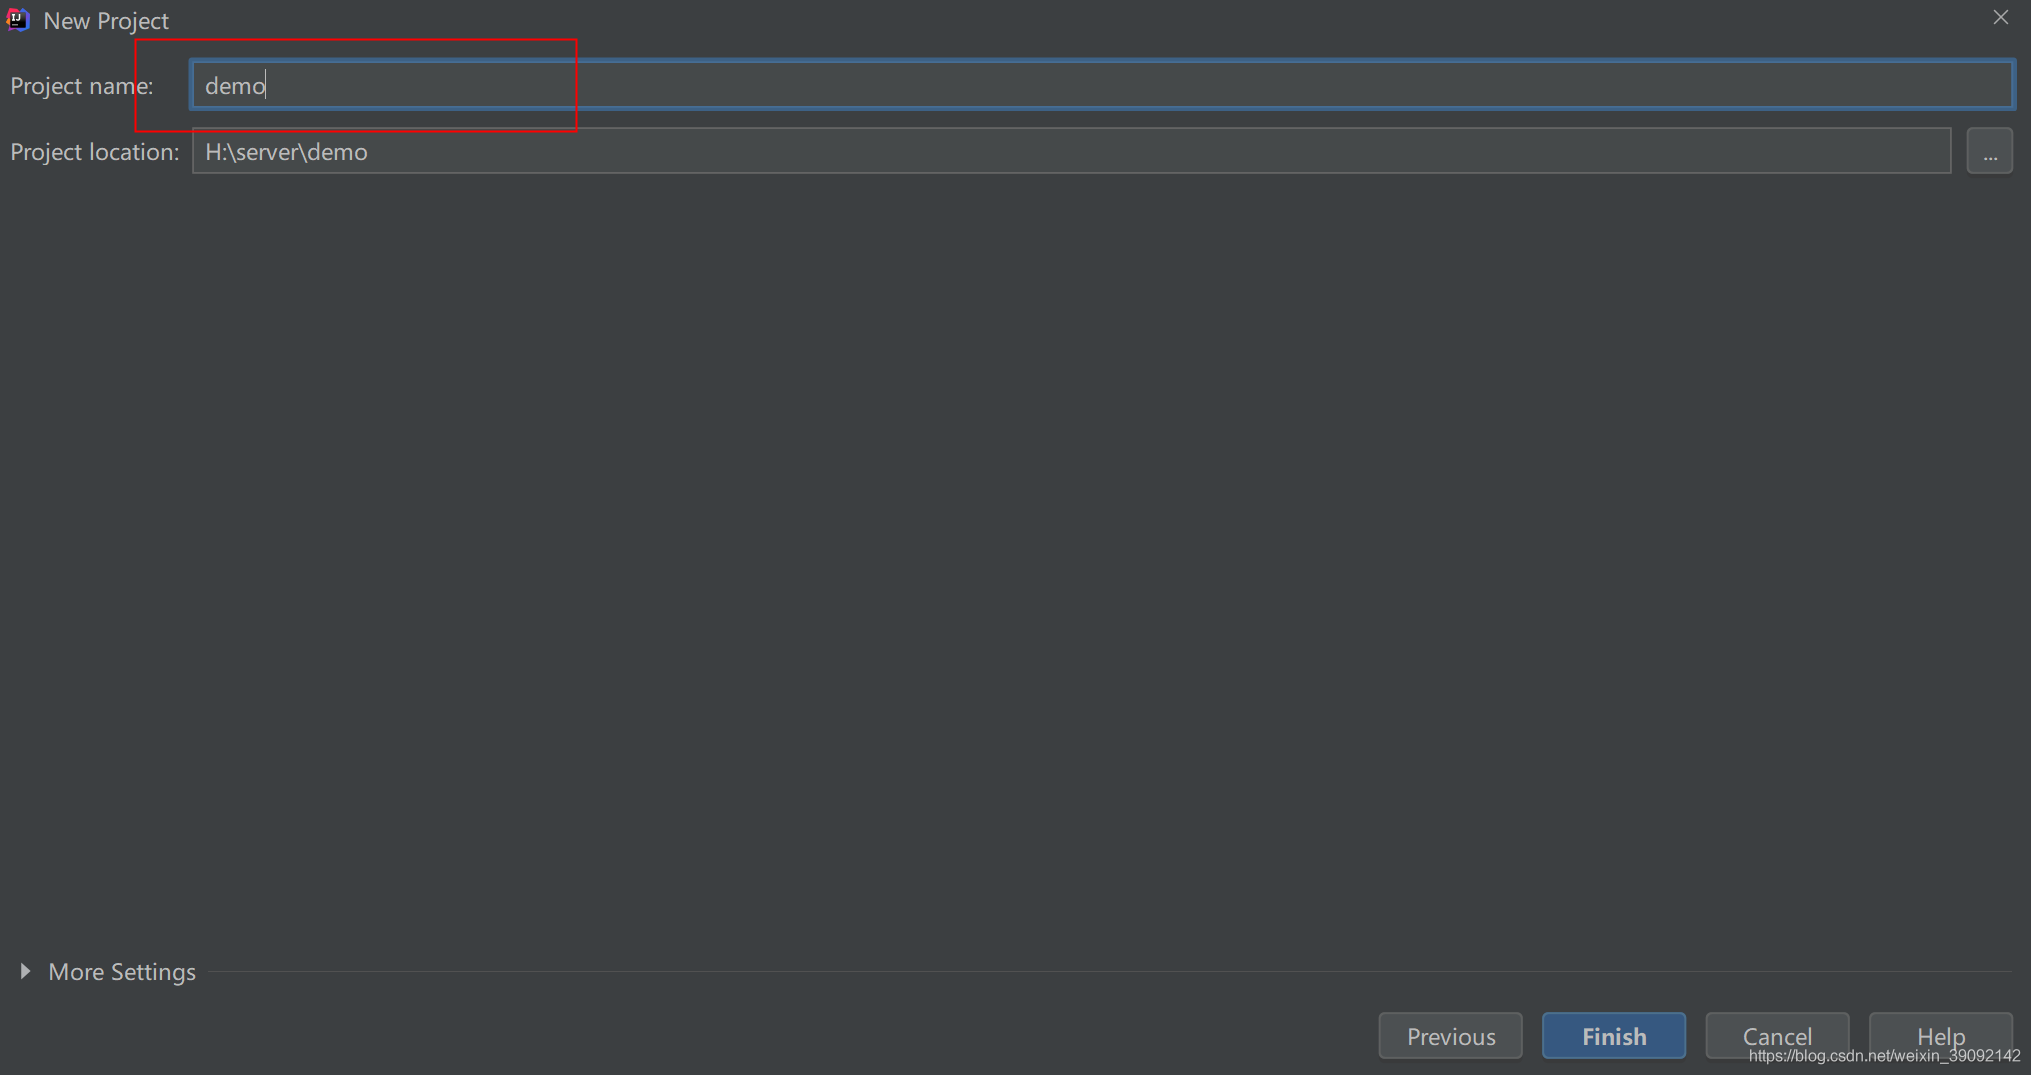
項目的初步架子已經搭建起來了。
2.等待項目從aliyun下載依賴。
大概要等待 1-3分鐘,根據自己的網絡快慢決定。
1.出現的 pom.xml 如下圖所示:
<properties> <java.version>1.8</java.version> </properties> <dependencies> <dependency> <groupId>org.springframework.boot</groupId> <artifactId>spring-boot-starter-web</artifactId> </dependency> <dependency> <groupId>mysql</groupId> <artifactId>mysql-connector-java</artifactId> <scope>runtime</scope> </dependency> <dependency> <groupId>org.projectlombok</groupId> <artifactId>lombok</artifactId> <optional>true</optional> </dependency> <dependency> <groupId>org.springframework.boot</groupId> <artifactId>spring-boot-starter-test</artifactId> <scope>test</scope> <exclusions> <exclusion> <groupId>org.junit.vintage</groupId> <artifactId>junit-vintage-engine</artifactId> </exclusion> </exclusions> </dependency> </dependencies>
此時的以來主要文件,下面引入 mybatis-plus 3.3.2 版本:
<dependency> <groupId>com.baomidou</groupId> <artifactId>mybatis-plus-boot-starter</artifactId> <version>3.3.2</version> </dependency>
將上面的文件復制放入到 MySQL 依賴后面(主要是放在dependencies里面都可以)
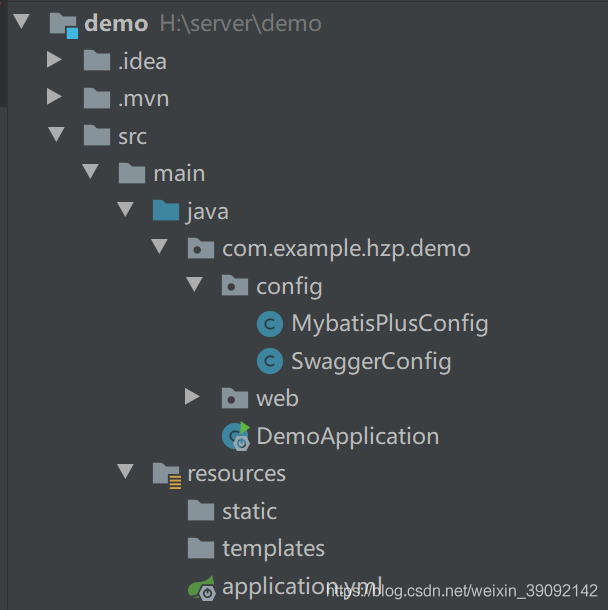
然后安裝官網給定的分頁配置,在文件中建立一個config ,結構如圖:
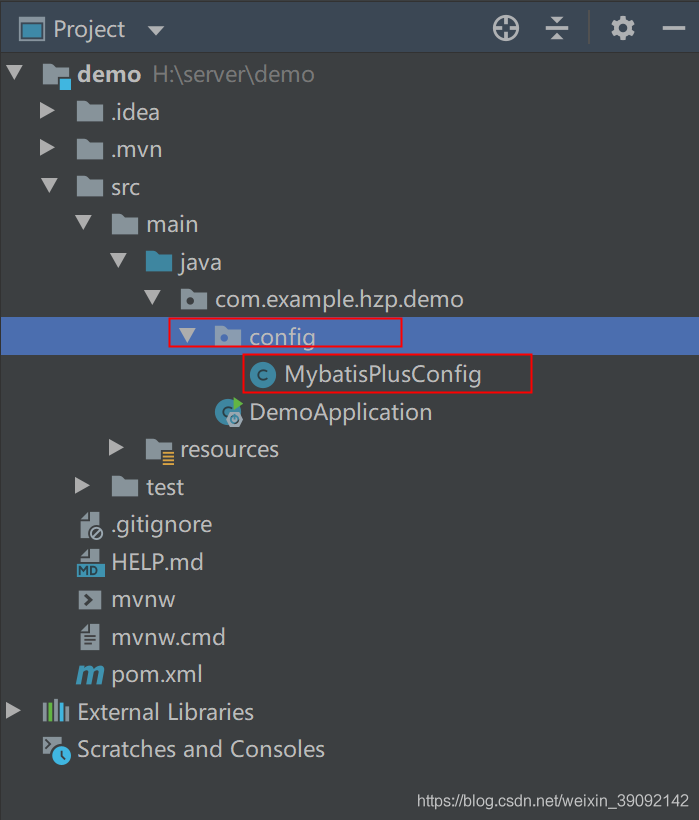
再創建一個MybatisPlusConfig.java,具體代碼如下:
import com.baomidou.mybatisplus.core.injector.DefaultSqlInjector;import com.baomidou.mybatisplus.core.injector.ISqlInjector;import com.baomidou.mybatisplus.extension.plugins.PaginationInterceptor;import com.baomidou.mybatisplus.extension.plugins.pagination.optimize.JsqlParserCountOptimize;import org.springframework.context.annotation.Bean;/** * @author hzp */public class MybatisPlusConfig { /** * 分頁插件 */ @Bean public PaginationInterceptor paginationInterceptor() { PaginationInterceptor paginationInterceptor = new PaginationInterceptor(); // 設置請求的頁面大于最大頁后操作, true調回到首頁,false 繼續請求 默認false // paginationInterceptor.setOverflow(false); // 設置最大單頁限制數量,默認 500 條,-1 不受限制 // paginationInterceptor.setLimit(500); // 開啟 count 的 join 優化,只針對部分 left join paginationInterceptor.setCountSqlParser(new JsqlParserCountOptimize(true)); return paginationInterceptor; }}
添加后完成了 mybatis-plus 的分頁插件。
2.對 swagger-ui 2.10.5 的引入首先在 pom.xml 文件中的 properties 下引入 <swagger.version>2.10.5</swagger.version>
<properties><java.version>1.8</java.version><swagger.version>2.10.5</swagger.version></properties>
再在po.xml 文件中的 dependencies 文件中引入一下配置:
<!-- swagger documents--> <dependency> <groupId>io.springfox</groupId> <artifactId>springfox-swagger2</artifactId> <version>${swagger.version}</version> </dependency> <dependency> <groupId>io.springfox</groupId> <artifactId>springfox-swagger-ui</artifactId> <version>${swagger.version}</version> <exclusions> <exclusion> <groupId>io.swagger</groupId> <artifactId>swagger-annotations</artifactId> </exclusion> <exclusion> <groupId>io.swagger</groupId> <artifactId>swagger-models</artifactId> </exclusion> </exclusions> </dependency> <dependency> <groupId>io.swagger</groupId> <artifactId>swagger-annotations</artifactId> <version>1.5.21</version> </dependency> <dependency> <groupId>io.swagger</groupId> <artifactId>swagger-models</artifactId> <version>1.5.21</version> </dependency> <dependency> <groupId>io.springfox</groupId> <artifactId>springfox-spring-webmvc</artifactId> <version>2.10.5</version> </dependency>
為什么要先剔除 swagger-annotations 和 swagger-models ,再引入它們,可以看看另一個鏈接:springboot使用 swagger-ui 2.10.5 有關版本更新帶來的問題當然為什么要引入: springfox-spring-webmvc 2.10.5 也可以看看上面這個鏈接。引入依賴后,在config 包下創建一個 SwaggerConfig.java 文件:
import org.springframework.beans.factory.annotation.Value;import org.springframework.context.annotation.Bean;import org.springframework.context.annotation.Configuration;import springfox.documentation.builders.ApiInfoBuilder;import springfox.documentation.builders.PathSelectors;import springfox.documentation.builders.RequestHandlerSelectors;import springfox.documentation.service.ApiInfo;import springfox.documentation.spi.DocumentationType;import springfox.documentation.spring.web.plugins.Docket;import springfox.documentation.swagger2.annotations.EnableSwagger2WebMvc;/** * @author hzp * @date 2020.12.05 */@EnableSwagger2WebMvc@Configurationpublic class SwaggerConfig { @Value('${swagger.enabled}') private Boolean enabled; @Bean @SuppressWarnings('all') public Docket createRestApi() { return new Docket(DocumentationType.SWAGGER_2) .enable(enabled) .apiInfo(apiInfo()) .pathMapping('/') .select() .apis(RequestHandlerSelectors.basePackage('com.example.hzp.demo.web')) .paths(PathSelectors.any()) .build(); } private ApiInfo apiInfo() { return new ApiInfoBuilder() .title('app 接口文檔') .description('后臺登錄') .version('1.0') .build(); }}
添加 druid 如下面所示:
<properties> <java.version>1.8</java.version> <swagger.version>2.10.5</swagger.version> <druid.version>1.1.17</druid.version> </properties>
添加 druid依賴:
<!-- druid --> <dependency> <groupId>com.alibaba</groupId> <artifactId>druid-spring-boot-starter</artifactId> <version>${druid.version}</version> </dependency>
然后建立一個 web 包,結構如下:
 完
完
成初步的TestController.java 編寫,如下圖所示:
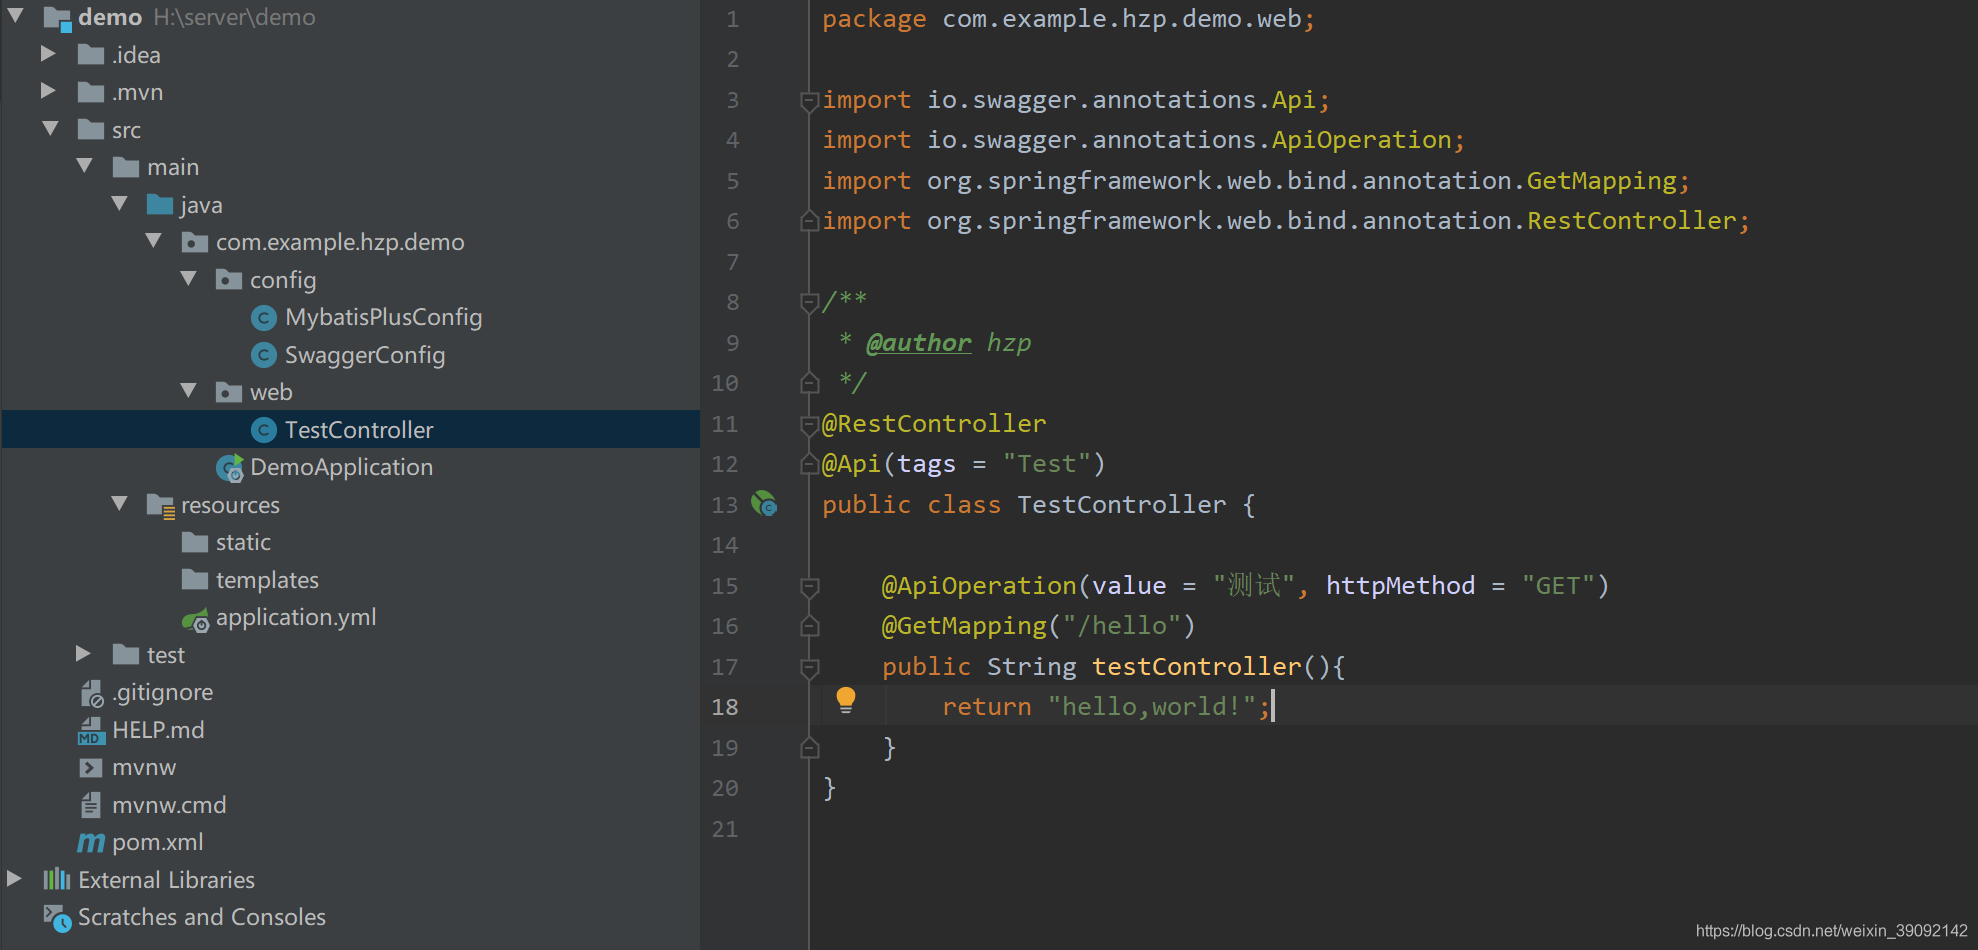
TestController.java
文件如下:
import io.swagger.annotations.Api;import io.swagger.annotations.ApiOperation;import org.springframework.web.bind.annotation.GetMapping;import org.springframework.web.bind.annotation.RestController;/** * @author hzp */@RestController@Api(tags = 'Test')public class TestController { @ApiOperation(value = '測試', httpMethod = 'GET') @GetMapping('/hello') public String testController(){ return 'hello,world!'; }}
完善application.yml 文件如下:
server: port: 8088spring: datasource: type: com.alibaba.druid.pool.DruidDataSource driver-class-name: com.mysql.cj.jdbc.Driver url: jdbc:mysql://loaclhost:3306/test?useUnicode=true&characterEncoding=utf-8&serverTimezone=Asia/Shanghai username: root password: 123456 druid: initial-size: 5 #連接池初始化大小 min-idle: 10 #最小空閑連接數 max-active: 20 #最大連接數 # web-stat-filter: # exclusions: '*.js,*.gif,*.jpg,*.png,*.css,*.ico,/druid/*' #不統計這些請求數據 stat-view-servlet: #訪問監控網頁的登錄用戶名和密碼 login-username: druid login-password: druid#是否開啟 swagger-uiswagger: enabled: truemybatis-plus: # 如果是放在src/main/java目錄下 classpath:/com/*/*/mapper/*Mapper.xml # 如果是放在resource目錄 classpath:/mapper/**.xml mapper-locations: classpath:/mapper/**.xml configuration: log-impl: org.apache.ibatis.logging.stdout.StdOutImpl
記住一定要有數據庫連接喲,這要的話 中間的 druid 等引入起來比較方便。
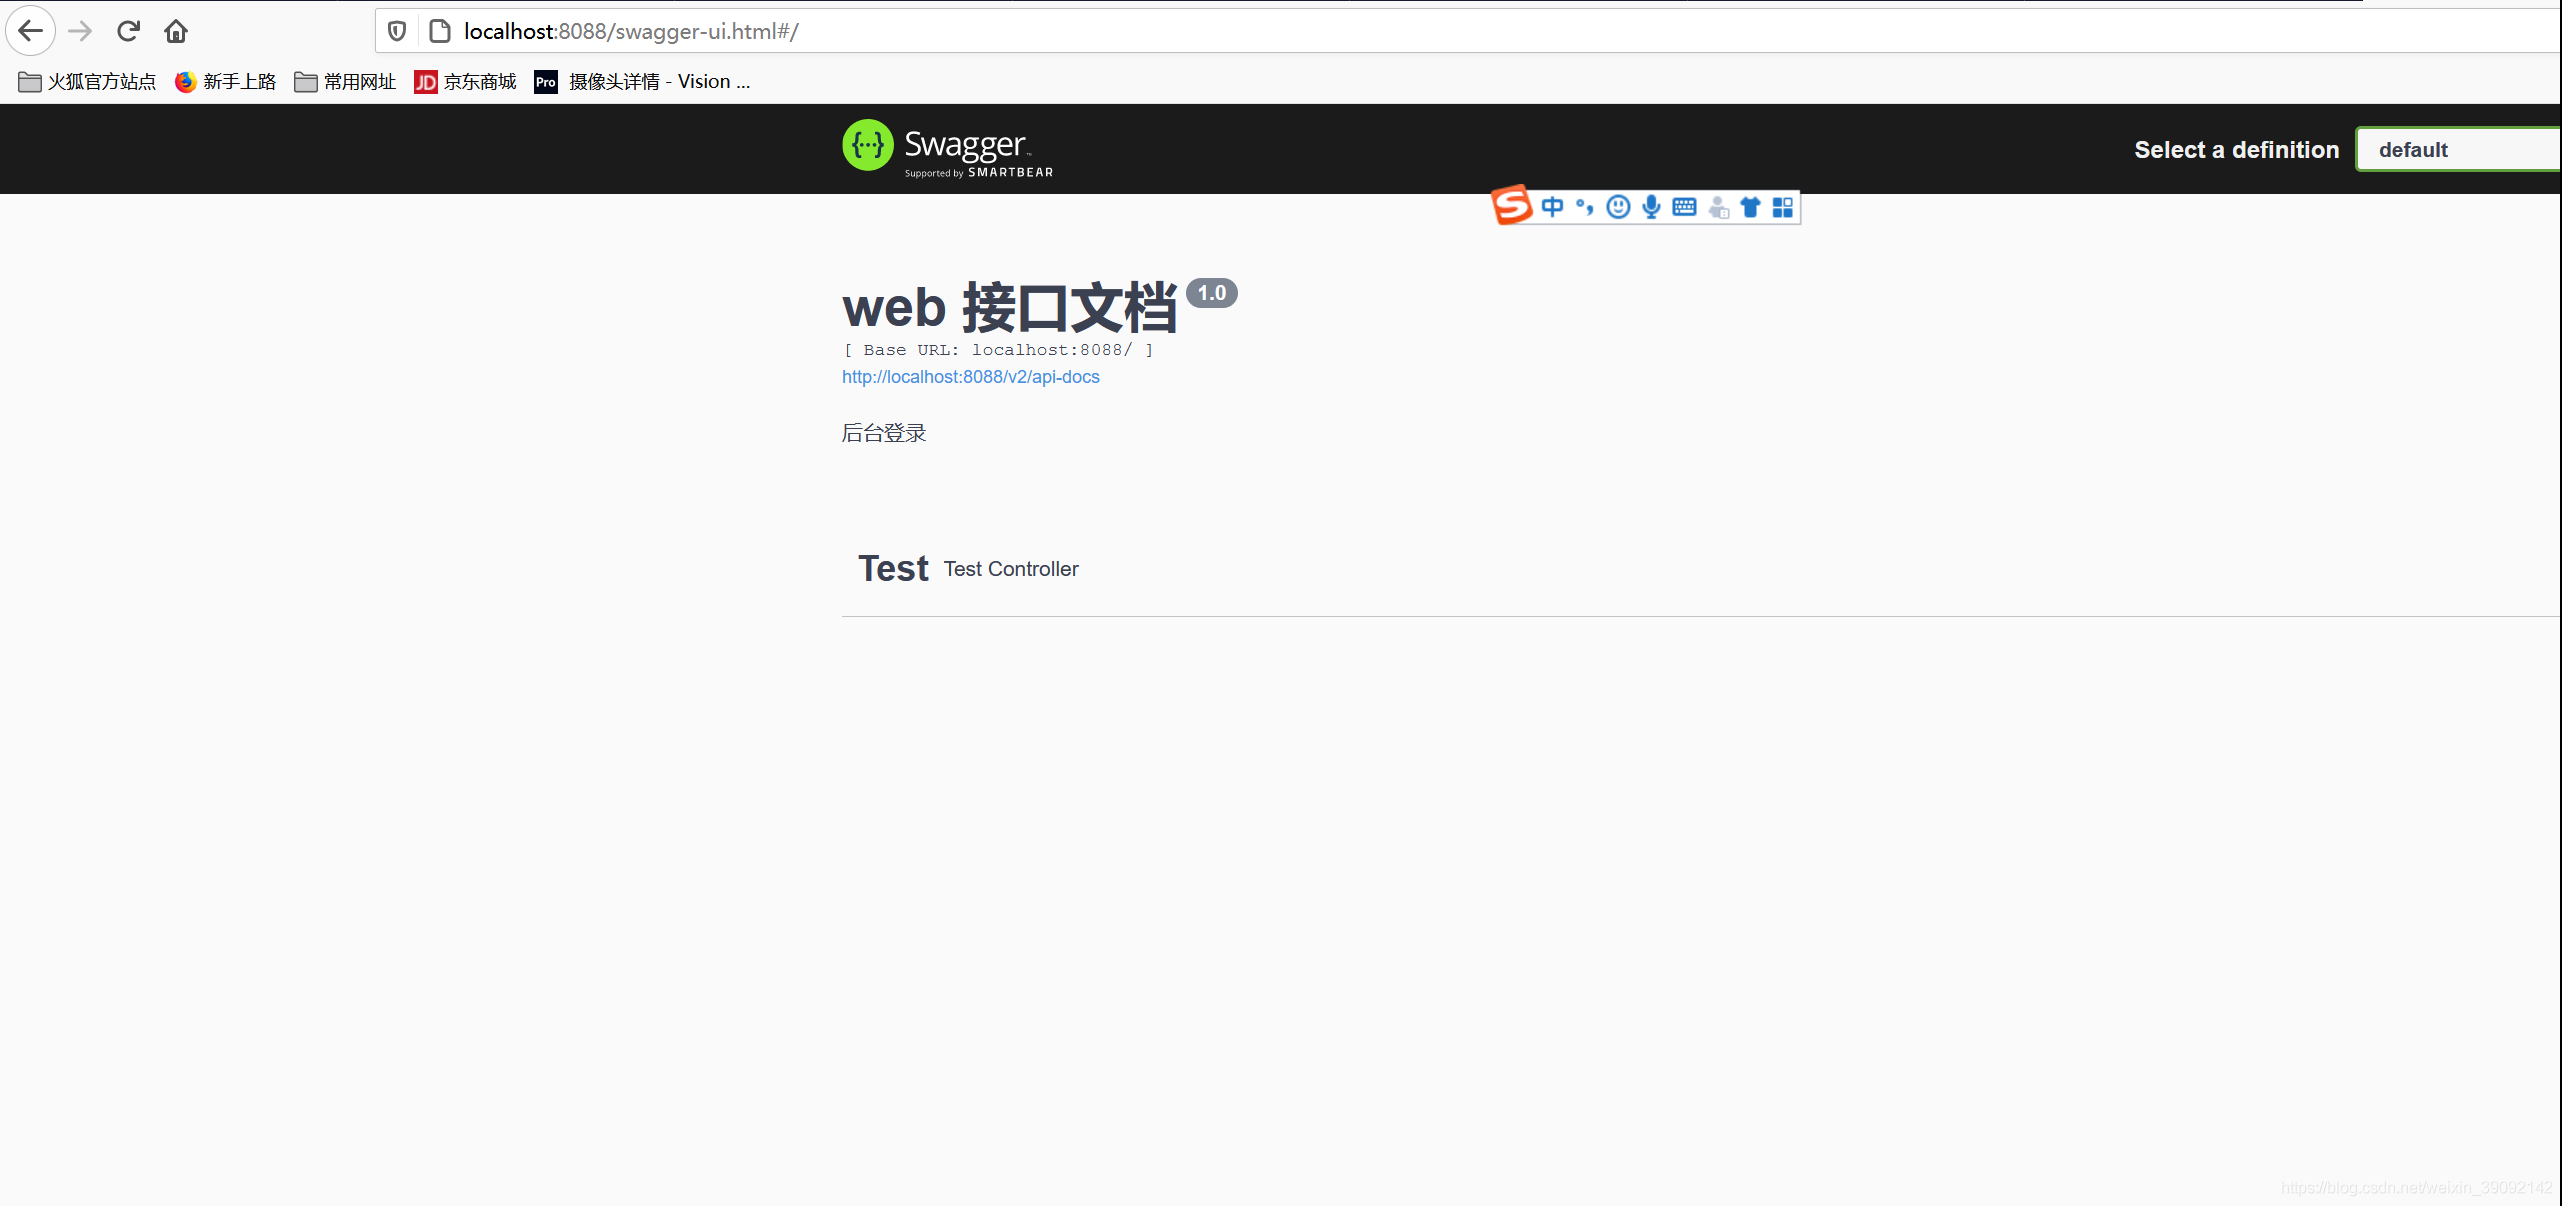
啟動項目后如圖所示:
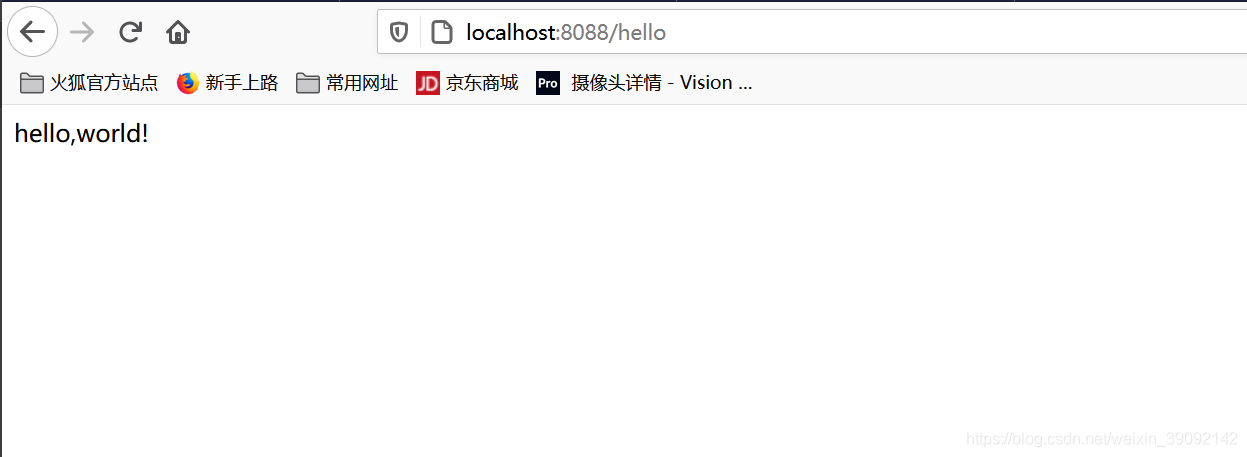
當然你也可以直接使用 鏈接進行訪問:localhost:8088/test 出現如圖所示:
至此,整個介紹基本完成,后續會上傳代碼到 git 上,感謝您的觀看。
到此這篇關于springboot+swagger2.10.5+mybatis-plus 入門的文章就介紹到這了,更多相關springboot swagger2.10.5 mybatis-plus 入門內容請搜索好吧啦網以前的文章或繼續瀏覽下面的相關文章希望大家以后多多支持好吧啦網!
相關文章:

 網公網安備
網公網安備