原生js實(shí)現(xiàn)拼圖效果
本文實(shí)例為大家分享了原生js實(shí)現(xiàn)拼圖效果的具體代碼,供大家參考,具體內(nèi)容如下
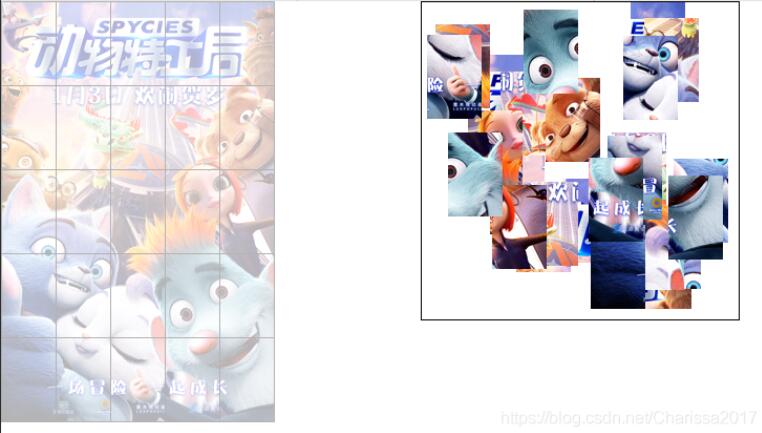
需求:每次刷新頁面后,右側(cè)容器內(nèi)會隨機(jī)排列碎片圖片,鼠標(biāo)按下拖動到左側(cè),在正確坐標(biāo)一定范圍內(nèi),圖片會自動吸附過去,放好的碎片不能再進(jìn)行拖動。
先來看一下效果:
js代碼 :
//執(zhí)行初始函數(shù)init();function init() { //創(chuàng)建一個碎片容器 var frag = document.createDocumentFragment(); document.body.style.margin = '0px'; //創(chuàng)建左側(cè)圖片容器 var ul=createE('ul',{width: '260px',height: '400px',backgroundImage: 'url(./img/3.jpg)',borderRight: '1px solid #000',borderBottom: '1px solid #000',listStyle: 'none',padding: '0px',margin: '0px',opacity: '.3',position: 'absolute' }) //創(chuàng)建li,顯示圖片中的邊框 var li=createE('li',{width: '51px',height: '79px',borderLeft: '1px solid #000',borderTop: '1px solid #000',padding: '0px',margin: '0px',float: 'left' }) //循環(huán),將li復(fù)制插入到ul中 for (i = 0; i < 25; i++) {ul.appendChild(li.cloneNode(false)); } //將ul插入到碎片容器中 frag.appendChild(ul); //創(chuàng)建右側(cè)圖片容器,因?yàn)閕mg要相對body定位,所以它的父容器不能有定位屬性 var div=createE('div',{width: '302px',height: '302px',border: '1px solid #000',marginLeft: '400px' }) //創(chuàng)建圖片標(biāo)簽 for (var j = 0; j < 5; j++) {for (var k = 0; k < 5; k++) { var img=createE('img',{width: '52px',height: '80px',position: 'absolute',left: Math.floor(Math.random() * 250) + 400 + 'px',top: Math.floor(Math.random() * 220) + 'px' }) img.src = 'http://www.lshqa.cn/bcjs/img/img' + j + '-' + k + '.jpg'; //圖片偵聽mouseHandler事件 img.addEventListener('mousedown', mouseHandler); div.appendChild(img);} } //將div插入到碎片容器中,再將frag插入到body中 frag.appendChild(div); document.body.appendChild(frag);}//鼠標(biāo)事件function mouseHandler(e) { switch (e.type) {case 'mousedown': //清除點(diǎn)擊后移動圖片的默認(rèn)效果 e.preventDefault(); console.log(this.src.match(/img/img(.*).jpg/)) //獲取到圖片路徑中的數(shù)字,計(jì)算圖片正確的位置坐標(biāo) var imgSrc = this.src.match(/img/img(.*).jpg/)[1].split('-'); var rightL=imgSrc[1]*52; var rightTop=imgSrc[0]*80; //如果圖片正確放入,直接跳出 if (this.style.left===rightL+'px' && this.style.top===rightTop+'px') return; //將當(dāng)前圖片的z-index設(shè)為最大 this.style.zIndex = '999'; //將e.offsetX、e.offsetY、當(dāng)前點(diǎn)擊圖片對象存入到document中 document.x = e.offsetX; document.y = e.offsetY; document.elem = this; document.rightL=rightL; document.rightTop=rightTop; //document偵聽mousemove事件和mouseup事件 document.addEventListener('mousemove', mouseHandler); document.addEventListener('mouseup', mouseHandler); break;case 'mousemove': //自動吸附的距離大小 var gap = 20; //設(shè)置當(dāng)前的圖片跟著鼠標(biāo)移動而移動 let x=e.clientX - this.x; let y=e.clientY - this.y; this.elem.style.left = x + 'px'; this.elem.style.top = y + 'px'; //如果當(dāng)前圖片的位置坐標(biāo)在一定范圍內(nèi),則讓它自動吸附 if (x>=this.rightL-gap &&x<=this.rightL+gap&&y>=this.rightTop-gap &&y<=this.rightTop+gap) {this.elem.style.left = this.rightL + 'px';this.elem.style.top = this.rightTop + 'px'; } break;case 'mouseup': //鼠標(biāo)松開的時候,將當(dāng)前圖片的z-index改小 this.elem.style.zIndex = '10'; //鼠標(biāo)松開后,移除document的mousemove和mouseup事件,清空數(shù)據(jù),防止內(nèi)容泄露 this.removeEventListener('mousemove', mouseHandler); this.removeEventListener('mouseup', mouseHandler); this.elem=null; break; }}//創(chuàng)建標(biāo)簽function createE(elem,styleData){ var elem=document.createElement(elem); for(var prep in styleData){elem.style[prep]=styleData[prep]; } return elem;}
以上就是本文的全部內(nèi)容,希望對大家的學(xué)習(xí)有所幫助,也希望大家多多支持好吧啦網(wǎng)。
相關(guān)文章:
1. Android 7.0 運(yùn)行時權(quán)限彈窗問題的解決2. java實(shí)現(xiàn)圖形化界面計(jì)算器3. IntelliJ IDEA設(shè)置條件斷點(diǎn)的方法步驟4. IDEA的Mybatis Generator駝峰配置問題5. ASP.NET MVC解決上傳圖片臟數(shù)據(jù)的方法6. Python使用oslo.vmware管理ESXI虛擬機(jī)的示例參考7. Thinkphp3.2.3反序列化漏洞實(shí)例分析8. python 批量將PPT導(dǎo)出成圖片集的案例9. 原生js XMLhttprequest請求onreadystatechange執(zhí)行兩次的解決10. python編寫函數(shù)注意事項(xiàng)總結(jié)

 網(wǎng)公網(wǎng)安備