Vue+Spring Boot簡單用戶登錄(附Demo)
1 概述
前后端分離的一個簡單用戶登錄 Demo 。
2 技術棧
Vue BootstrapVue Kotlin Spring Boot MyBatis Plus3 前端
3.1 創建工程
使用 vue-cli 創建,沒安裝的可以先安裝:
sudo cnpm install -g vue @vue/cli
查看版本:
vue -V
出現版本就安裝成功了。
創建初始工程:
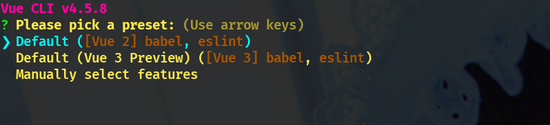
vue create bvdemo
由于目前 Vue3 還沒有發布正式版本,推薦使用 Vue2 :
等待一段時間構建好了之后會提示進行文件夾并直接運行:
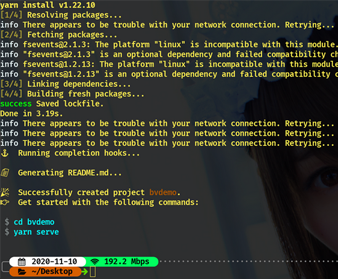
cd bvdemoyarn serve
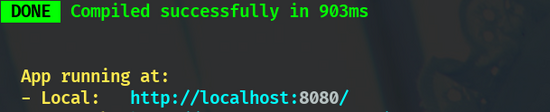
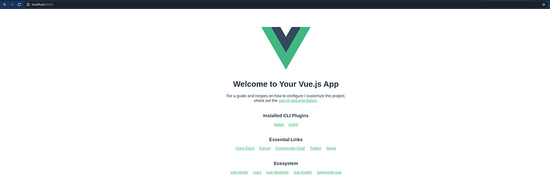
直接通過本地的 8080 端口即可訪問:
3.2 依賴
進入項目文件夾:
cd bvdemo
安裝依賴:
cnpm install bootstrap-vue axios jquery vue-router
應該會出現 popper.js 過期的警告,這是 bootstrap-vue 的原因,可以忽略:

依賴說明如下:
bootstrap-vue :一個結合了 Vue 與 Bootstrap 的前端 UI 框架 axios 是一個簡潔易用高效的 http 庫,本項目使用其發送登錄請求 jquery :一個強大的 JS 庫 vue-router : Vue 的官方路由管理器3.3 開啟補全
在正式編寫代碼之前開啟對 bootstrap-vue 的補全支持,打開設置:

將項目路徑下的 node_modules 添加到庫中,把前面的勾給勾上,接著更新緩存并重啟(`File->Invalidate Cache/Restart`)。
3.4 App.vue
去掉默認的 HelloWorld 組件,并修改 App.vue 如下:
<template> <div id='app'> <router-view></router-view> </div></template><script>export default { name: ’App’,}</script><style>#app { font-family: Avenir, Helvetica, Arial, sans-serif; -webkit-font-smoothing: antialiased; -moz-osx-font-smoothing: grayscale; text-align: center; color: #2c3e50; margin-top: 60px;}</style>
<router-view> 是一個 functional 組件,渲染路徑匹配到的視圖組件,這里使用 <router-view> 根據訪問路徑(路由)的不同顯示(渲染)相應的組件。
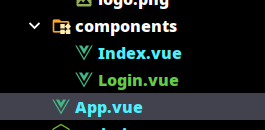
3.5 新建 vue 組件
刪除默認的 HelloWorld.vue ,新建 Index.vue 以及 Login.vue :
3.6 添加路由
在 main.js 同級目錄下新建 router.js ,內容如下:
import Vue from 'vue'import VueRouter from 'vue-router'import Login from '@/components/Login'import Index from '@/components/Index'Vue.use(VueRouter)const routes = [ { path: ’/’, component: Login, props: true }, { path:’/index/:val’, name:’index’, component: Index, props: true }]const router = new VueRouter({ mode:’history’, routes:routes})export default router
routes 表示路由,其中包含了兩個路由,一個是 Login 組件的路由 / ,一個是 Index 組件的路由 /index/:val ,后者中的 :val 是占位符,用于傳遞參數。 router 表示路由器, mode 可以選擇 hash 或 history :
hash 會使用 URL 的 hash 來模擬一個完整的 URL ,當 URL 改變時頁面不會重新加載 history 就是普通的正常 URLrouter 中的 routes 參數聲明了對應的路由,最后要記得把 router 添加到 main.js 中。
3.7 vue.config.js
在 package.json 同級目錄下創建 vue.config.js ,內容如下:
module.exports = { chainWebpack: config => { config.module .rule(’vue’) .use(’vue-loader’) .loader(’vue-loader’) .tap(options => {options.transformAssetUrls = { img: ’src’, image: ’xlink:href’, ’b-img’: ’src’, ’b-img-lazy’: [’src’, ’blank-src’], ’b-card’: ’img-src’, ’b-card-img’: ’src’, ’b-card-img-lazy’: [’src’, ’blank-src’], ’b-carousel-slide’: ’img-src’, ’b-embed’: ’src’}return options }) }}
使用該配置文件主要是因為 <b-img> 的 src 屬性不能正常讀取圖片,添加了該配置文件后即可按路徑正常讀取。
3.8 main.js
添加依賴以及路由:
import Vue from ’vue’import App from ’./App.vue’import {BootstrapVue, BootstrapVueIcons} from ’bootstrap-vue’import router from '@/router';import ’bootstrap/dist/css/bootstrap.css’import ’bootstrap-vue/dist/bootstrap-vue.css’Vue.use(BootstrapVue)Vue.use(BootstrapVueIcons)Vue.config.productionTip = falsenew Vue({ render: h => h(App), router}).$mount(’#app’)
引入 BootstrapVue ,并把路由注冊到 Vue 實例中(就是倒數第2行,作為創建 Vue 實例的參數,注意這個很重要,不然路由功能不能正常使用)。
3.9 登錄組件
也就是 Login.vue ,內容如下:
<template> <div> <b-img src='http://www.lshqa.cn/assets/logo.png'></b-img> <br> <b-container> <b-row><b-col offset='3' cols='6'> <b-input-group size='lg'> <b-input-group-text>用戶名</b-input-group-text> <b-form-input type='text' v-model='username'></b-form-input> </b-input-group></b-col> </b-row> <br> <b-row><b-col offset='3' cols='6'> <b-input-group size='lg'> <b-input-group-text>密碼</b-input-group-text> <b-form-input type='password' v-model='password'></b-form-input> </b-input-group></b-col> </b-row> <br> <b-row><b-col offset='3' cols='6'> <b-button variant='success' @click='login'> 一鍵注冊/登錄 </b-button></b-col> </b-row> </b-container> </div></template><script>import axios from ’axios’import router from '@/router'export default { name: 'Login.vue', data:function (){ return{ username:’’, password:’’ } }, methods:{ login:function(){ axios.post('http://localhost:8080/login',{username:this.username,password:this.password }).then(function (res){router.push({ name:'index', params:{ val:res.data.code === 1 }}) }) } }}</script><style scoped></style>
采用了網格系統布局 <b-row> + <b-col> ,其他組件就不說了,大部分組件官網都有說明(可以 戳這里 ),發送請求采用了 axios ,參數包裝在請求體中,注意需要與后端( @RequestBody ,寫在請求頭請使用 @RequestParm )對應。
另外還需要注意的是跨域問題,這里的跨域問題交給后端處理:
@CrossOrigin(http://localhost:8081)
(本地測試中后端運行在 8080 端口,而前端運行在 8081 端口)
發送請求后使用路由進行跳轉,攜帶的是 res.data.code 參數 ,其中 res.data 是響應中的數據,后面的 code 是后端自定義的數據,返回 1 表示注冊成功,返回 2 表示登錄成功。
3.10 首頁組件
首頁簡單地顯示了登錄或注冊成功:
<template> <div> <b-img src='http://www.lshqa.cn/assets/logo.png'></b-img> <b-container> <b-row align-h='center'><b-col> <b-jumbotron header='注冊成功' lead='歡迎' v-if='val'></b-jumbotron> <b-jumbotron header='登錄成功' lead='歡迎' v-else></b-jumbotron></b-col> </b-row> </b-container> </div></template><script>export default { name: 'Index.vue', props:[’val’]}</script><style scoped></style>
props 表示 val 是來自其他組件的參數,并將其作為在 v-if 中進行條件渲染的參數。
這樣前端就做好了。下面開始介紹后端。
4 后端
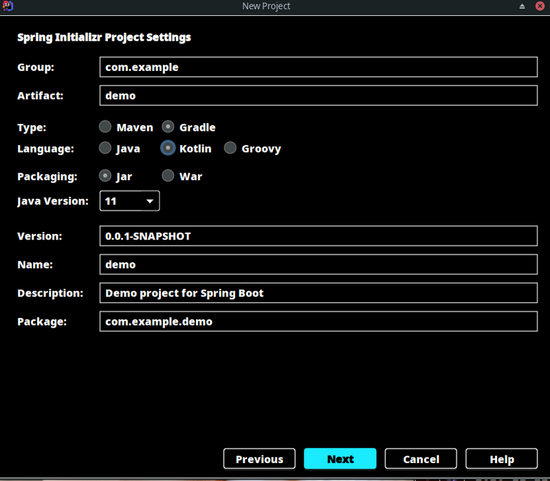
4.1 創建工程
采用 Kotlin + Gradle + MyBatisPlus 構建,新建工程如下:
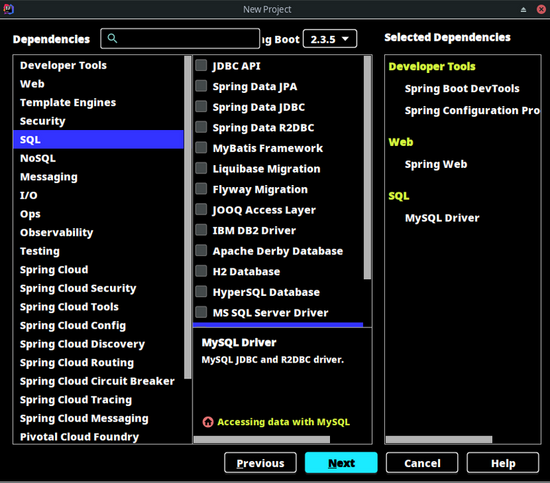
4.2 依賴
引入 MyBatis Plus 依賴即可:
implementation('com.baomidou:mybatis-plus-boot-starter:3.4.0')
4.3 數據表
create database if not exists test;use test;drop table if exists user;create table user( id int auto_increment primary key , username varchar(30) default ’’, password varchar(30) default ’’)
4.4 配置文件
數據庫用戶名+密碼+ url :
spring: datasource: url: jdbc:mysql://localhost:3306/test username: root password: 123456
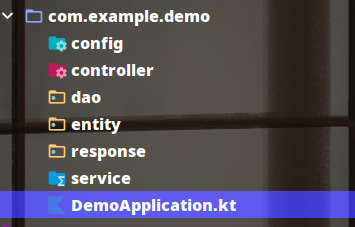
4.5 新建包
新建如下六個包,分別表示配置類、控制層、持久層、實體類、響應類、業務層。
4.6 實體類
package com.example.demo.entityclass User(var username:String,var password:String)
4.7 持久層
package com.example.demo.daoimport com.baomidou.mybatisplus.core.mapper.BaseMapperimport com.example.demo.entity.Userimport org.apache.ibatis.annotations.Mapperimport org.apache.ibatis.annotations.Select@Mapperinterface DemoMapper :BaseMapper<User>{ @Select('select * from user where username=#{username} and password = #{password}') fun selectByUsernameAndPassword(username:String,password:String):List<User>}
@Mapper 表示給 Mapper 接口生成一個實現類,并且不需要編寫 xml 配置文件。 @Select 表示進行查詢的 sql 語句。
4.8 響應體
package com.example.demo.responseclass DemoResponse{ var data = Any() var code = 0 var message = ''}
package com.example.demo.responseclass DemoResponseBuilder { private var response = DemoResponse() fun data(t:Any): DemoResponseBuilder { response.data = t return this } fun code(t:Int): DemoResponseBuilder { response.code = t return this } fun message(t:String): DemoResponseBuilder { response.message = t return this } fun build() = response}
這里響應體分為:
響應碼 響應體數據 其他信息與前端約定即可。生成響應體通過一個 Builder 類生成。
4.9 業務層
package com.example.demo.serviceimport com.demo.response.DemoResponseimport com.demo.response.DemoResponseBuilderimport com.example.demo.dao.DemoMapperimport com.example.demo.entity.Userimport org.springframework.beans.factory.annotation.Autowiredimport org.springframework.stereotype.Serviceimport org.springframework.transaction.annotation.Transactional@Service@Transactionalclass DemoService{ @Autowired lateinit var mapper: DemoMapper fun login(username:String, password:String): DemoResponse { val result = mapper.selectByUsernameAndPassword(username,password).size if(result == 0) mapper.insert(User(username,password)) return DemoResponseBuilder().code(if(result == 0) 1 else 2).message('').data(true).build() }}
@Service 標記為業務層, @Transactional 表示添加了事務管理,持久層操作失敗會進行回滾。 @Autowired 表示自動注入,在 Java 中可以使用直接使用 @Autowired ,而在 Kotlin 中需要使用 lateinit var 。
4.10 控制層
package com.example.demo.controllerimport com.demo.response.DemoResponseimport com.example.demo.entity.Userimport com.example.demo.service.DemoServiceimport org.springframework.beans.factory.annotation.Autowiredimport org.springframework.web.bind.annotation.*@RestController@RequestMapping('/')@CrossOrigin('http://localhost:8081')class DemoController { @Autowired lateinit var service: DemoService @PostMapping('login') fun login(@RequestBody user: User):DemoResponse { return service.login(user.username, user.password) }}
主要就是添加了一個跨域處理 @CrossOrigin ,開發時請對應上前端的端口。
4.11 配置類
package com.example.demo.configimport org.mybatis.spring.annotation.MapperScanimport org.springframework.context.annotation.Configuration@Configuration@MapperScan('com.example.demo.dao')class MyBatisConfig
@MapperScan 表示掃描對應包下的 @Mapper 。
4.12 測試
package com.example.demoimport com.example.demo.service.DemoServiceimport org.junit.jupiter.api.Testimport org.springframework.beans.factory.annotation.Autowiredimport org.springframework.boot.test.context.SpringBootTest@SpringBootTestclass DemoApplicationTests { @Autowired lateinit var service: DemoService @Test fun contextLoads() { println(service.login('123', '456')) }}
測試通過后后端就算完成了。
5 總測試
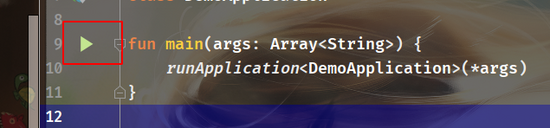
先運行后端, Kotlin 不像 Java ,生成工程時能自動配置了啟動配置,需要手動運行啟動類中的 main :
再運行前端:
npm run serve
不想用命令行的話可以使用圖形界面配置一下:
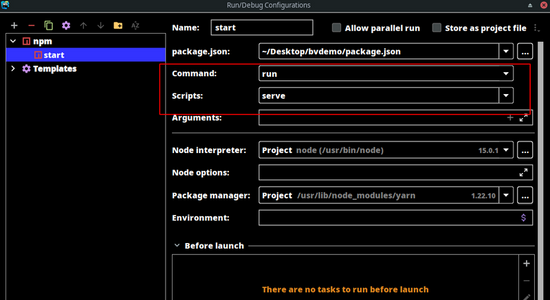
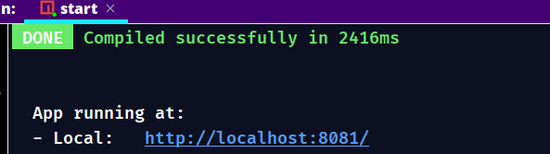
根據控制臺輸出打開 localhost:8081 :
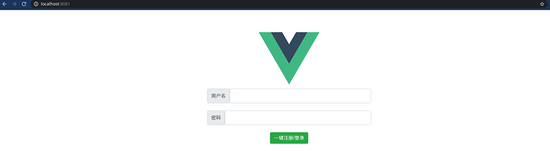
隨便輸入用戶名與密碼,不存在則創建,存在則登錄:


注冊的同時后端數據庫會生成一條記錄:

再次輸入相同的用戶名和密碼會顯示登錄成功:

這樣就正式完成了一個簡單的前后端分離登錄 Demo 。
到此這篇關于Vue+Spring Boot簡單用戶登錄(附Demo)的文章就介紹到這了,更多相關Vue+Spring Boot 用戶登錄 內容請搜索好吧啦網以前的文章或繼續瀏覽下面的相關文章希望大家以后多多支持好吧啦網!
相關文章:

 網公網安備
網公網安備